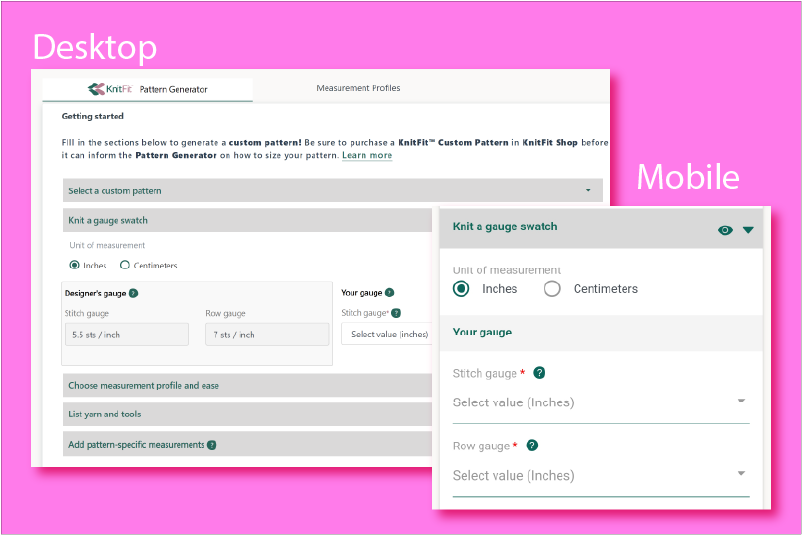
Gauge is of particular importance when generating KnitFit™ Custom Patterns because your gauge swatch measurement directly impacts the accuracy of the pattern instructions.
When our pattern generator creates instructions, your gauge is a key factor in the equation because it determines the stitch counts in your pattern instructions. With this innovation, you can knit in any gauge that’s comfortable for you, but the importance of the gauge swatch measurement is magnified.
In this guide we’ll discuss how to accurately measure your gauge: the number of stitches and rows in your swatch, washing and blocking, and measuring the swatch. You may also want to browse the following article before choosing your yarn:
Testing Needle Sizes in the Swatching Process
When you’re ready to knit your gauge swatch, take a look at the label to find the recommended needle size for the yarn you have chosen. If you can’t find it, you can take a look at the Yarn Estimation Charts to see common needle sizes and how they correspond to various yarn weights. This will be a good place to start, but it’s up to you to decide how you like the resulting fabric. If you want a denser, thicker fabric, go down a needle size and knit another swatch; if you want a looser, more drapey fabric, go up in needle size.
While contemplating your desired fabric, this is also a good time to think about how different fiber types work as fabrics. Many plant fibers such as linen or cotton tend to stretch horizontally, while alpaca can stretch out vertically. For the most stable fabric, a blend of fibers is often the most dependable option. Keep in mind too that fibers that don’t stretch can be more difficult to knit tightly, which can result in a looser fabric as you relax into your knitting.
Consider Gauge Instructions on the Yarn Label
While KnitFit™ allows you to determine your own gauge, we acknowledge that the yarn manufacturer’s suggestion offers helpful insight. Knitting to the gauge suggested on the label will likely lead to a nice fabric. For example, if a yarn label reads “22 sts to 4in/10cm using a size US 6/4mm needle” you can bet that the resulting fabric will have a good feel–not too dense, not too loose. That said, this is just a good starting point, not the last word. Your tension may differ from the yarn company’s standard, and that ultimately determines the gauge measurement and how the fabric feels. Make sure the gauge measurements you enter into the pattern generator are based on the most consistent stitches in your favorite swatch, regardless of the label.
Swatch Size and Accuracy
When it comes to knitting your gauge swatch, we recommend casting on 40 stitches and knitting 40 rows in order to create a substantial swath of fabric for checking gauge. The pitfall of the common 20-stitch or 4”/10cm swatch is that they usually have a completely different tension than a garment is likely to have halfway through the project. A large swatch allows the knitter to relax into a more natural tension—closer to that which will be used throughout the project. Additionally, tension is changed by the proximity to the cast-on and bind-off rows to where the gauge is often measured. These rows can be much tighter or much looser than the regular stitches, depending on the techniques used. The larger swatch allows you to measure in the middle, far from any differentiation in tension. While it might feel like a lot of knitting for nothing, we can assure you that this is going to help get you a garment that actually fits in the end, and that peace of mind is worth a lot as you knit your garment!
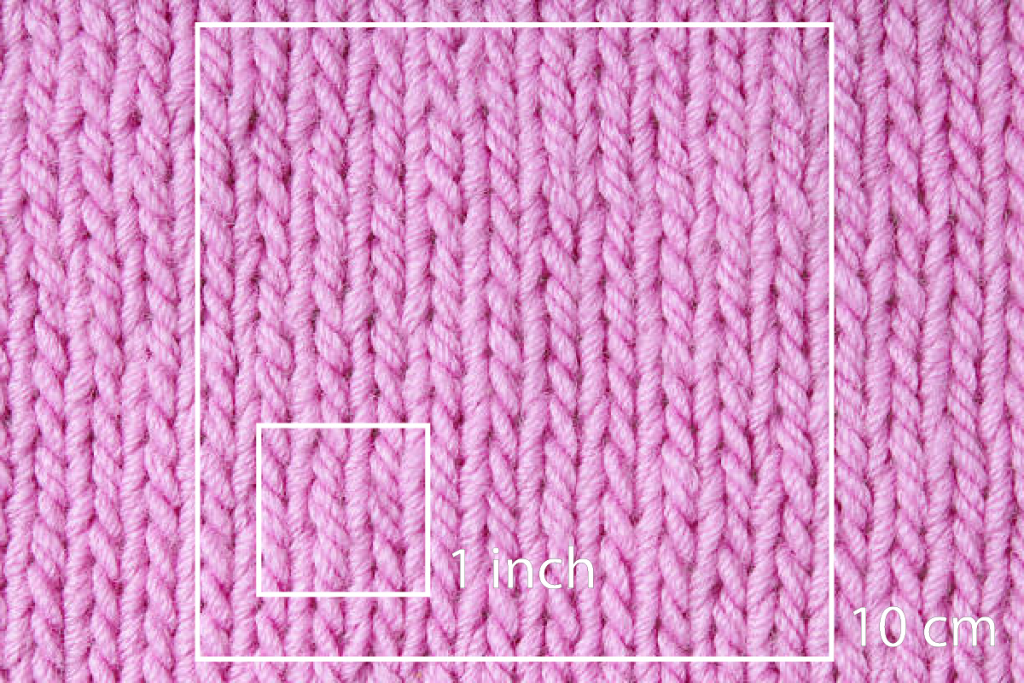
Measuring Your Gauge from the Swatch
You’re not trying to match any designer’s gauge here, so just knit comfortably–as long as you like the fabric, you “got gauge!” Now you just need to measure it carefully in order to input your correct gauge in the pattern generator. Wash and block your swatch using the method you will use to wash and block your final garment. When dry, measure the innermost stitches (where they are the most consistent):
- If you’re using inches, measure the number of stitches and rows per 1 square inch.
- If using centimeters, measure the number of stitches and rows per 10 square centimeters.
While there is a lot to consider in getting an accurate gauge, it means you can tailor so many aspects of the pattern: the sizing and shaping possibilities are endless, the yarn weight, the fiber type, the needle size, the fabric density, etc. Spend a little extra time getting your gauge right and then enjoy knitting a project that fits all your most important preferences!
Go to custom pattern generation instructions
Read our article, 'How to Generate a Custom Pattern' to learn the steps to getting your own custom-sized pattern.