Measurements: How to Create an Ideal Profile
Taking measurements properly is a crucial element of getting a perfect fit. It’s important that all of the measurements in your KnitFit™ profiles are taken in a systematic, uniform way. This ensures that the Pattern Generator can properly define the size and proportion of your wearer’s body so it can create knitting instructions for garments with that bespoke fit that you’re looking for.
This article describes how to take accurate measurements. Here is a description of how to create a measurement profile on the KnitFit™ app.
Important Notes
Before we get started, let’s go over a few important notes about how to make sure your measurements are accurate.
Exact Measurements Only
Please resist the urge to estimate or exaggerate measurements! Our Pattern Generator will automatically make the necessary adjustments for each pattern to create the fit and shaping you want. The generator will expect the measurements to be taken as described in this article, so if your measurements are taken in a different way, it can create unexpected results. Plus, the alterations you want to make are available (at the designer’s discretion) when you generate a pattern! All patterns offer your choice of ease, and most also allow you to choose garment length, sleeve length, etc. That’s the place to add your custom alterations to get a garment that fits perfectly and shows off your wearer’s unique style.
You’ll Need a Helper
We intend for the reader of this guide to be the person who is taking measurements of another person’s body. We will assume that you, the reader and probably knitter, are taking measurements of the wearer. If you want to take measurements for your own profile, you will be in the wearer’s position. You may be able to take many of these measurements yourself, but you’ll find that you will need assistance for some of them.
Everyone has different personal space boundaries, and some of the tape measure positions may feel awkward to you or your wearer. Feel free to collaborate however you both feel comfortable to find the best way to get the tape measure into the correct position. This is just about getting the right numbers!
About the Side of the Body
When measurements rely on identifying the “side” of your wearer’s body, imagine a straight line connecting the center of the shoulder joint to the center of the hip joint, and use this as your guide. Avoid using the side seams of the wearer’s current garment, as we want all reference points to be parts of the body, not the clothes.
Set Up
First let’s prepare to take measurements. Make sure your wearer is barefoot or in flat-soled shoes, and wearing light, well-fitting clothing. Heels can alter posture, and bulky or baggy clothes can add to the measurements or displace the tape measure, so it’s best to avoid them while taking measurements. Long hair can be tied up to keep it out of the way.
If your wearer does not stand, simply have them position themselves comfortably in their most neutral posture for taking measurements.
DON’T:
DO:
You will need a tape measure. We highly recommend a soft tape measure made for measuring bodies. If you don’t have one, these can be purchased at any yarn, sewing, or craft store.
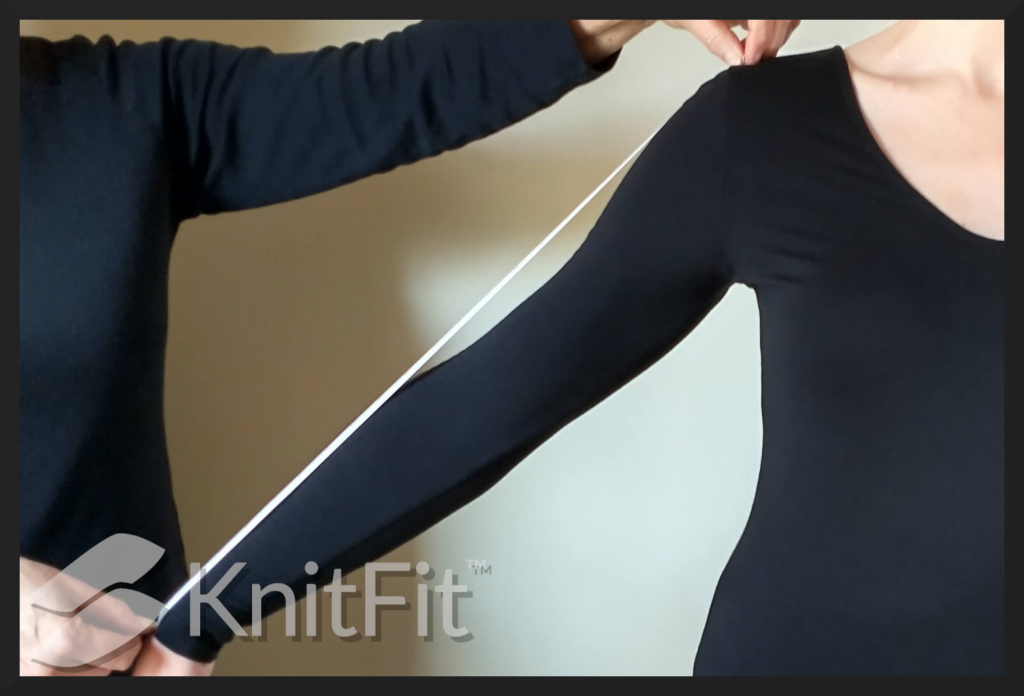
If necessary, you can also carefully take measurements with a piece of (non-stretch) string and hold it against a rigid tape measure or yard stick. However, this method is inherently unreliable and may result in errors, so we do not recommend it.
Taking Measurements
Create a new measurement profile on the KnitFit™ app, or open the profile you’d like to edit. Have your wearer stand with legs shoulder width apart, facing you (or again, in their most neutral position).
Body Size
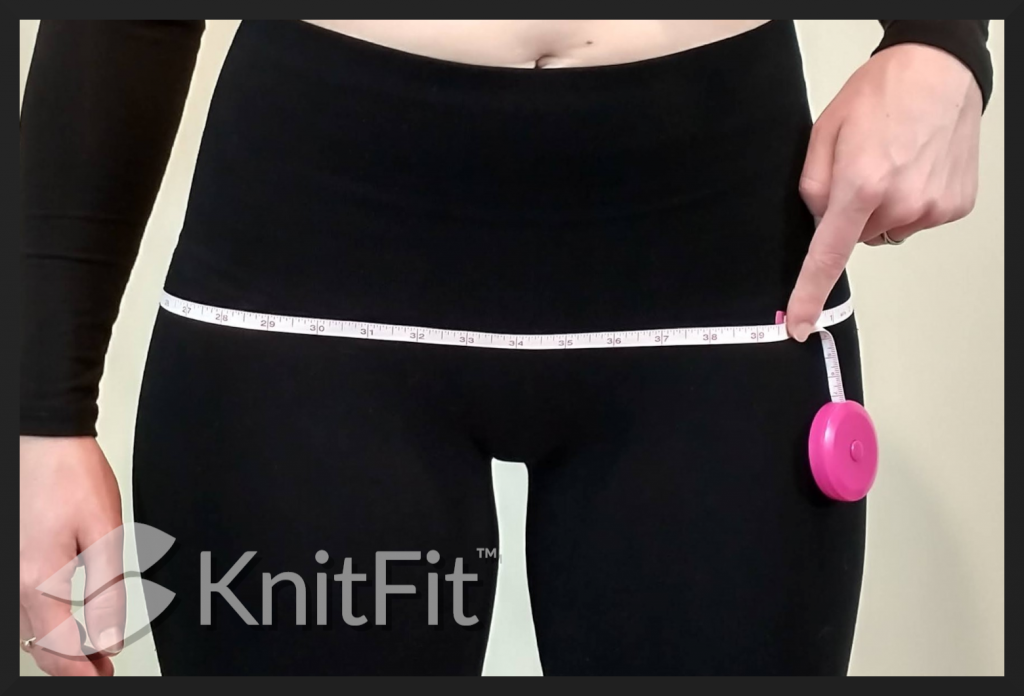
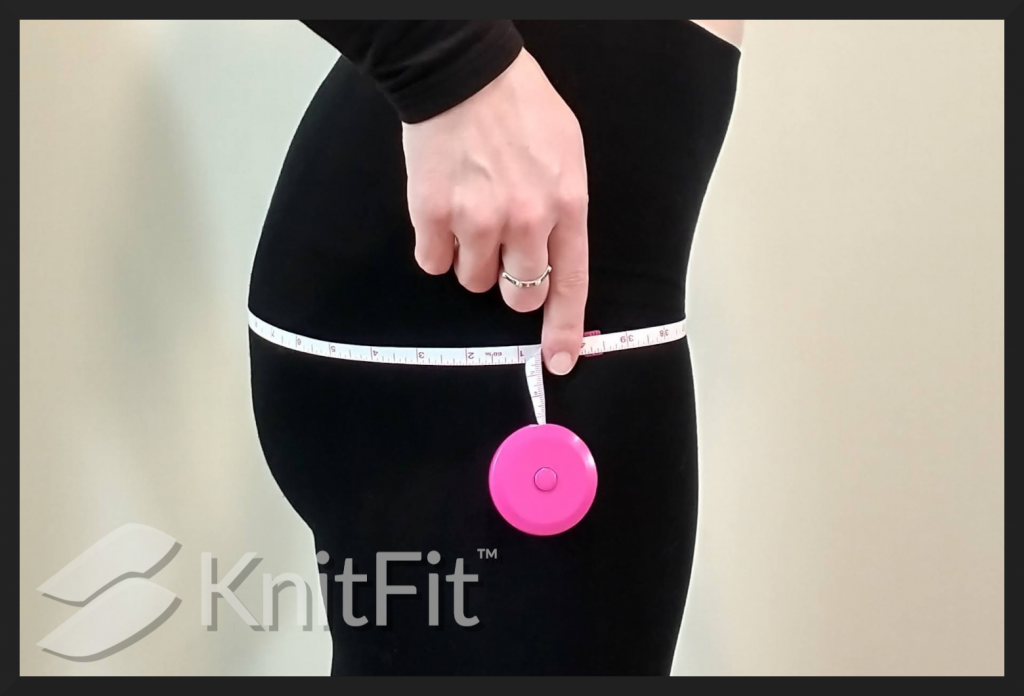
Hips
Measure the circumference around the hips at their widest point. Sometimes this may be a few inches higher or lower than the hip joints, so make sure your position the tape measure where it gets the largest measurement. Remember the position of the tape measure because it will be referenced in other measurements.
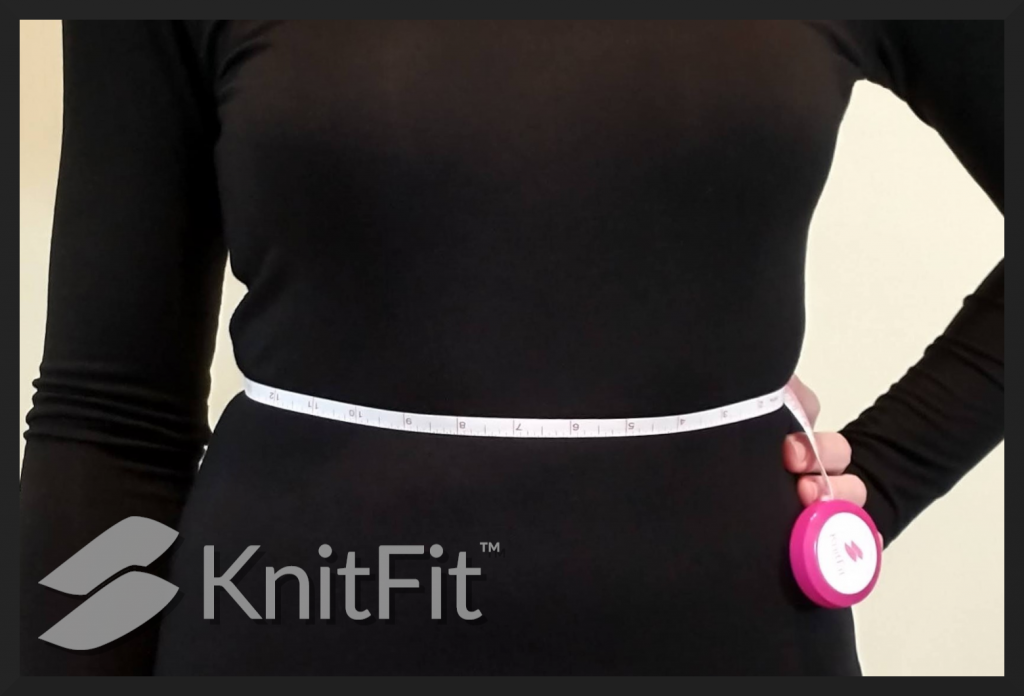
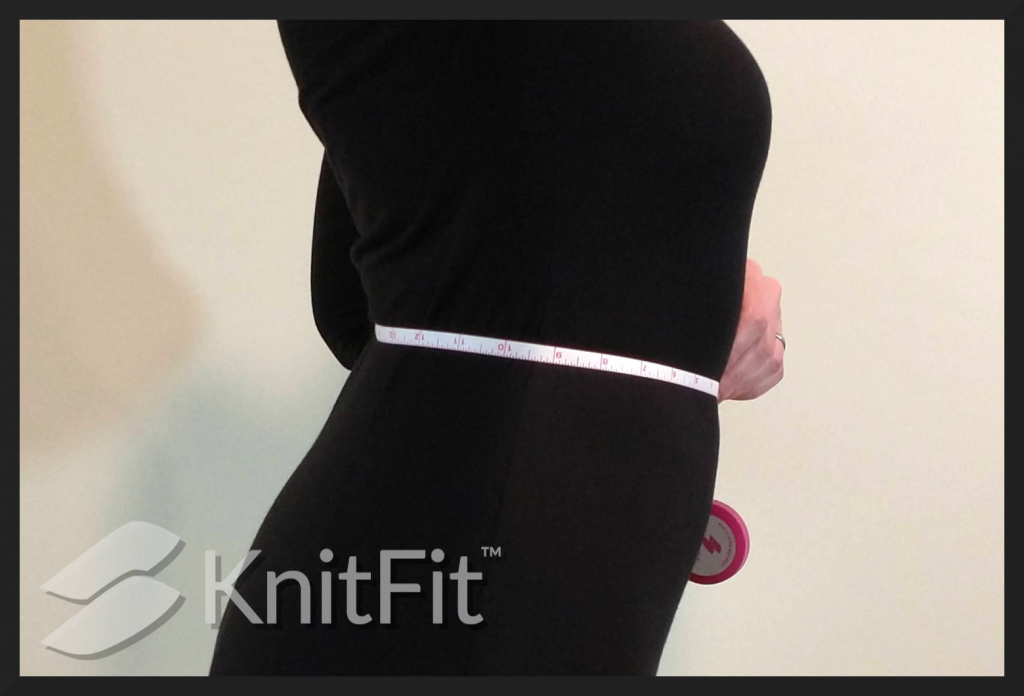
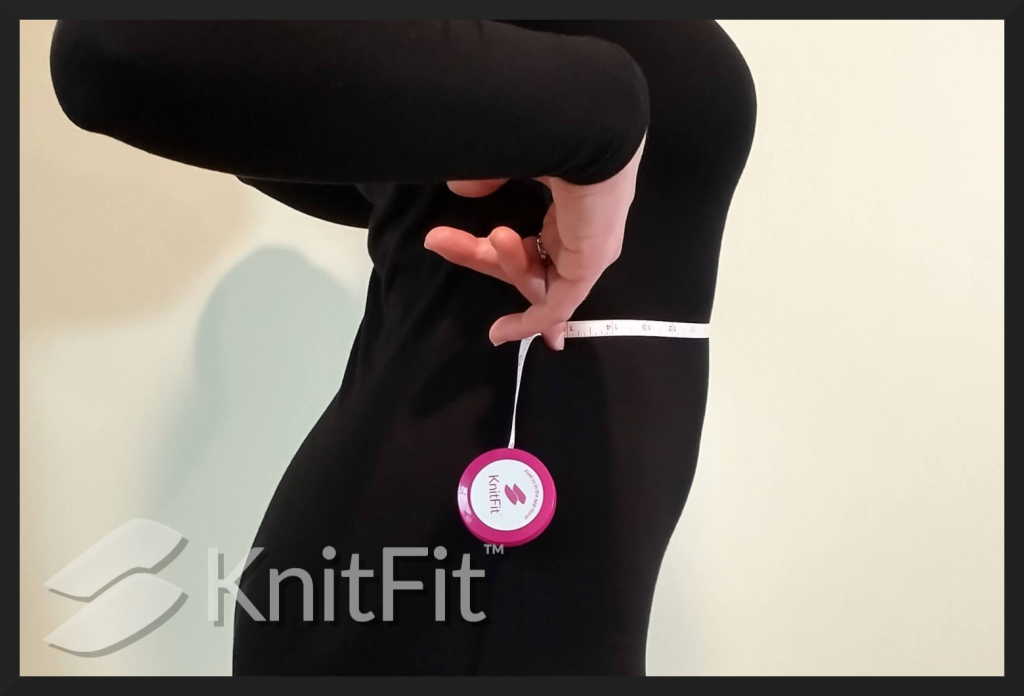
Waist
Measure the circumference of the waist about 1 inch above the belly button (or at the smallest point, if applicable). Remember the position of the tape measure because it will be referenced in other measurements.
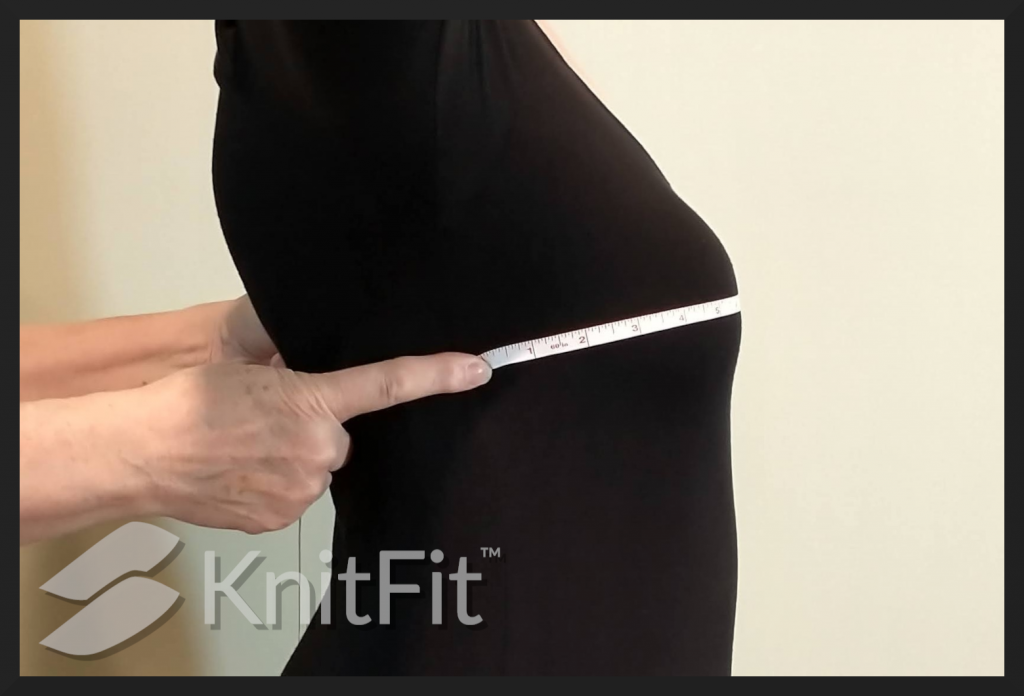
Waist Front
Measure from side to side across the front of the waist about 1 inch above the belly button (or at the smallest point, if applicable).
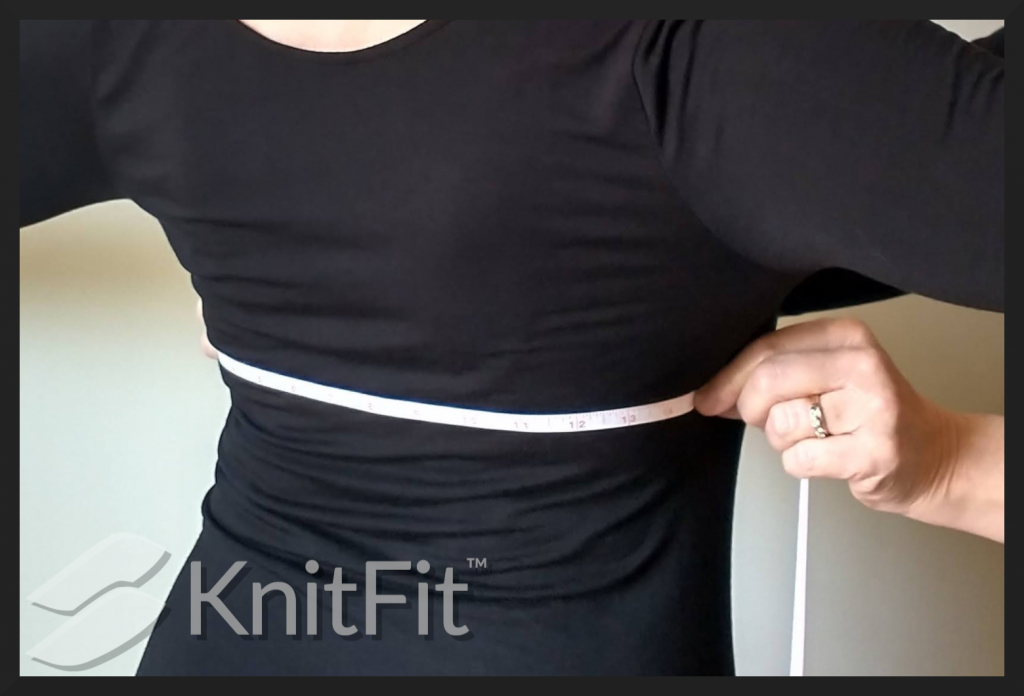
Chest
Measure the circumference of the chest at the nipple line or widest point. Remember the position of the tape measure because it will be referenced in other measurements.
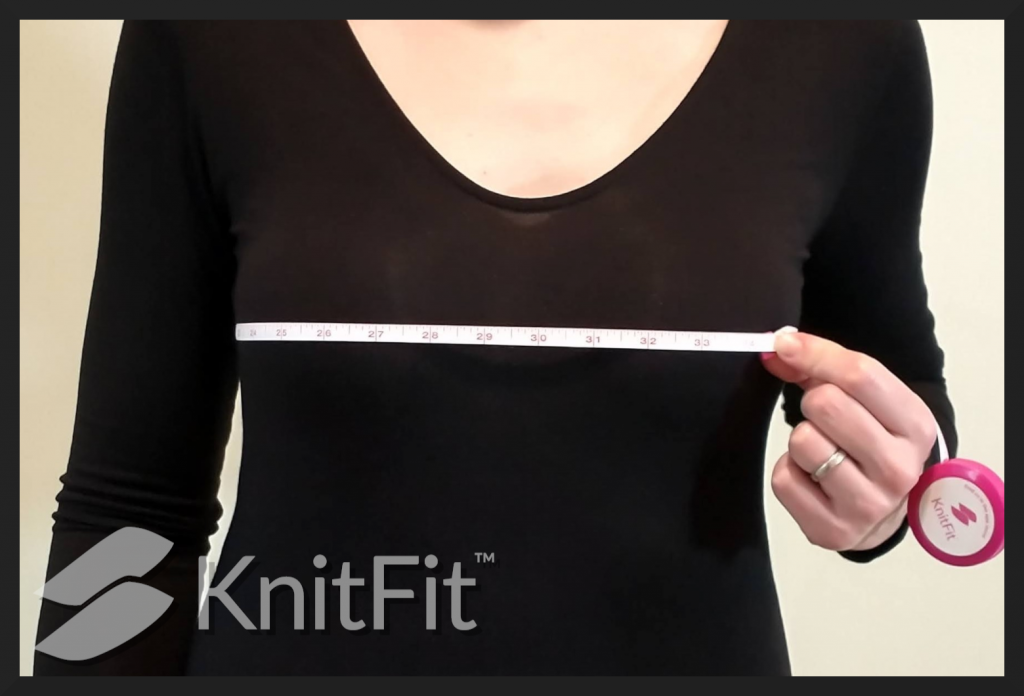
Chest Front
Measure from side to side across the front of the chest at the nipple line or widest point.
Chest Back
Measure from side to side across the back of the chest at the nipple line or widest point.
Body Length
Waist to Underarm
Measure from the center of the underarm to the waist at side.
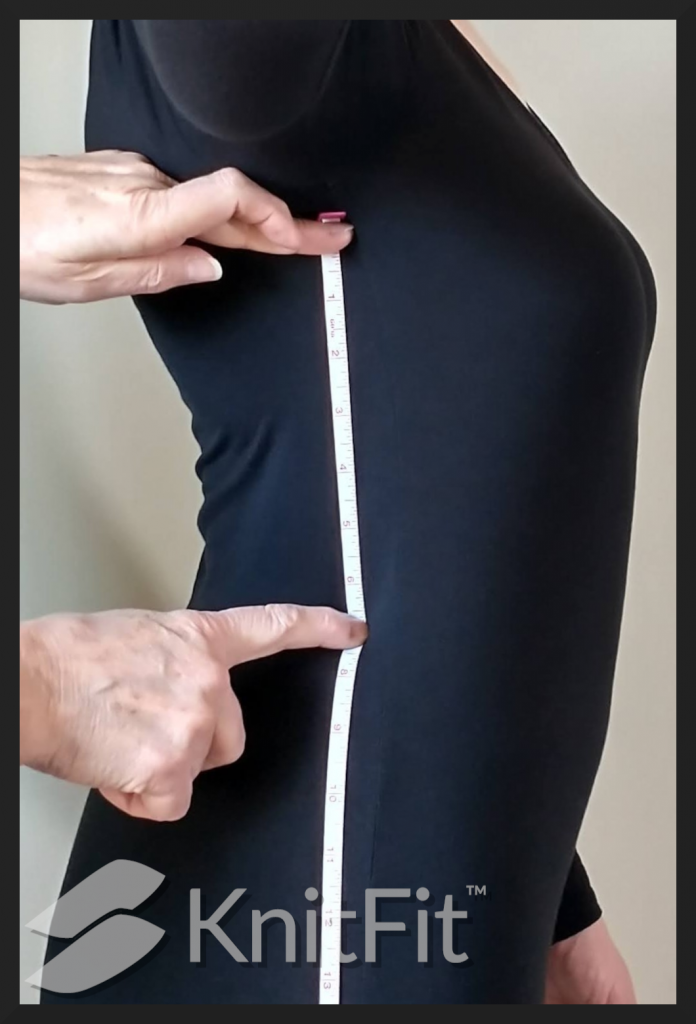
Armhole Depth
Place a ruler or similar straight, rigid object under the arm so that it rests comfortably against the underarm and is parallel to the floor with arm resting at side. Measure from the top of the shoulder to the top of the ruler at front.

Arm Size
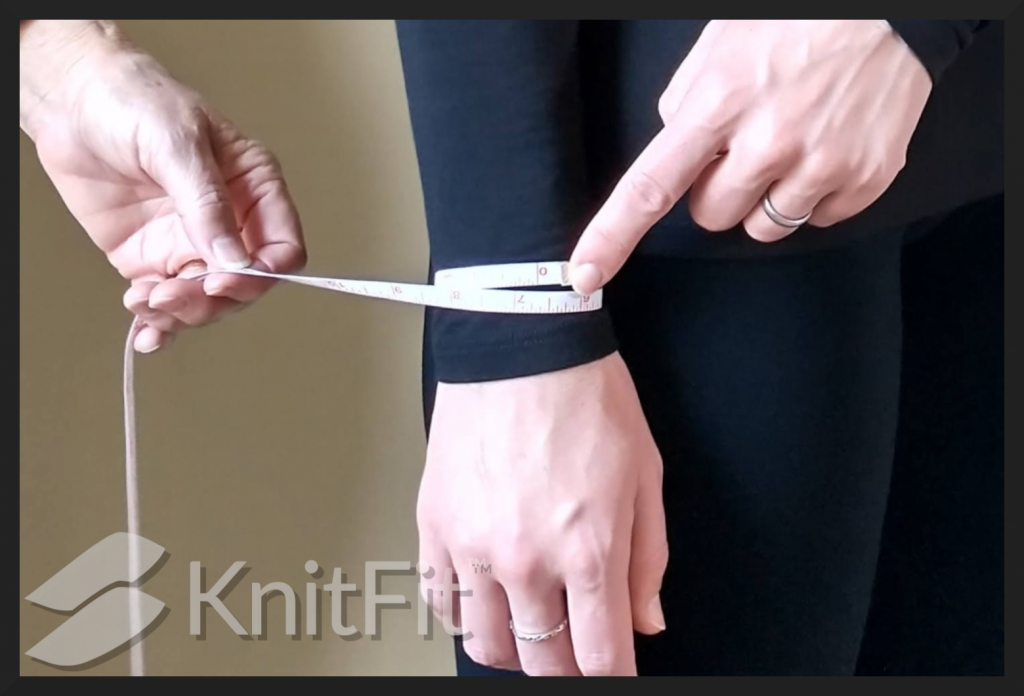
Wrist Circumference
Find the bending point in the wrist by flexing the hand up and down. Measure the circumference just above the bending point. Remember the position of the tape measure because it will be referenced in other measurements.
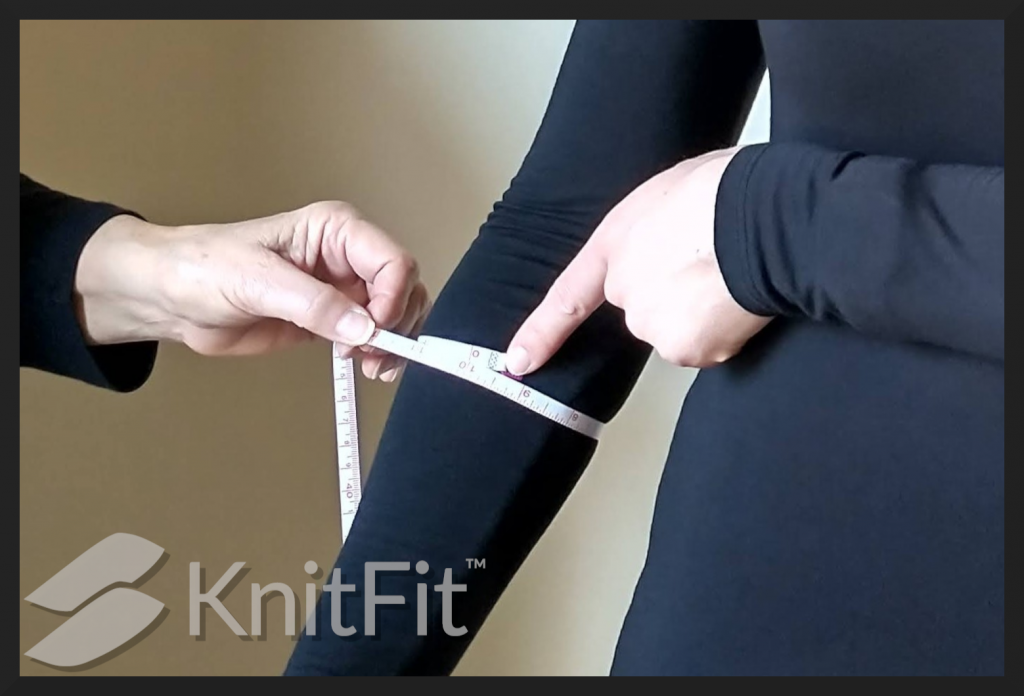
Forearm Circumference
Measure the circumference of the forearm at the widest point.
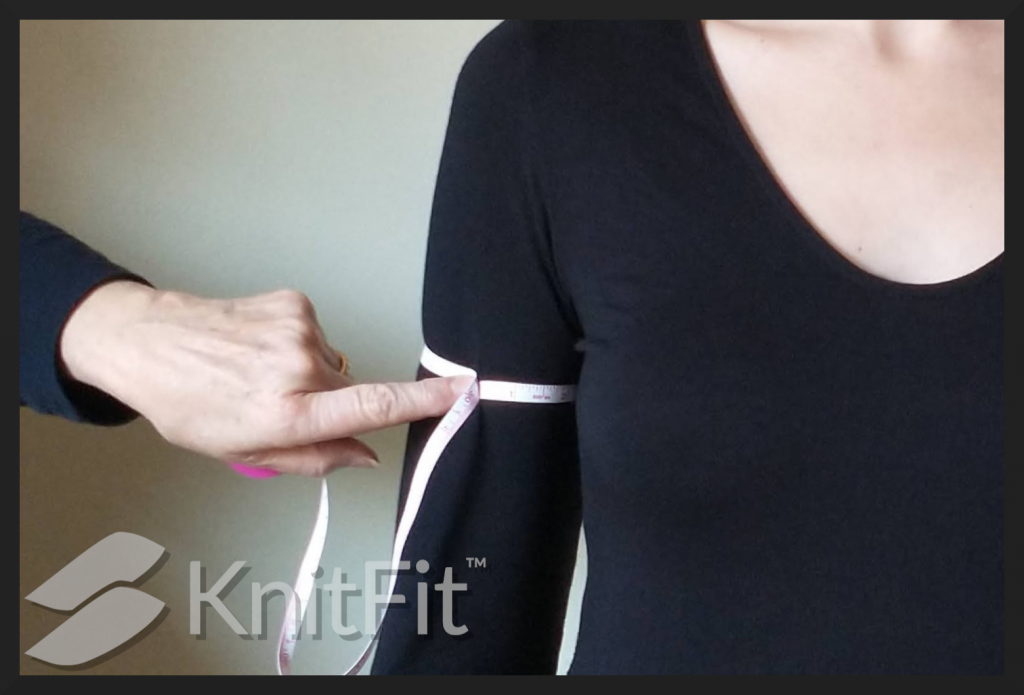
Upper Arm Circumference
With arm comfortably at side, measure the circumference of the upper arm at the widest point.
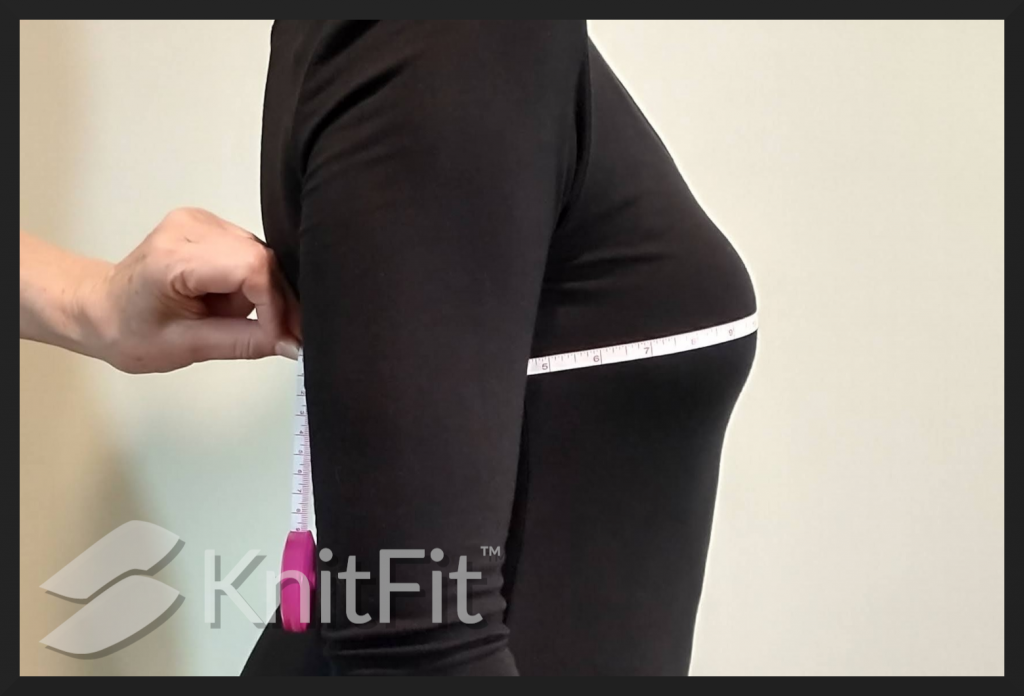
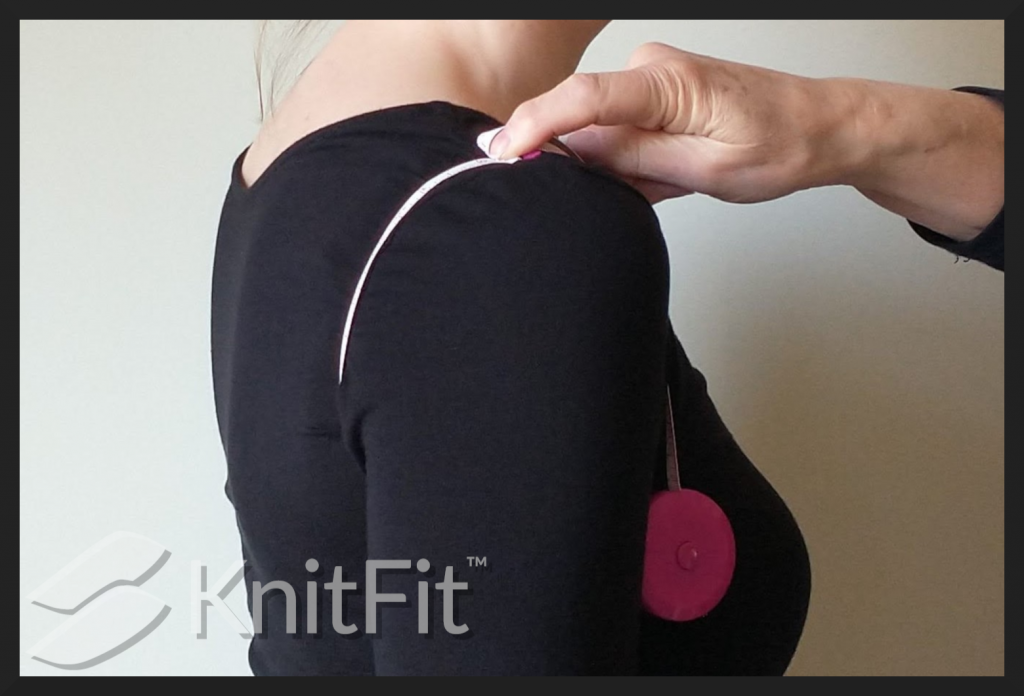
Shoulder Circumference
With arm comfortably at side, measure the vertical circumference around the underarm to the top of the shoulder.
Arm Length
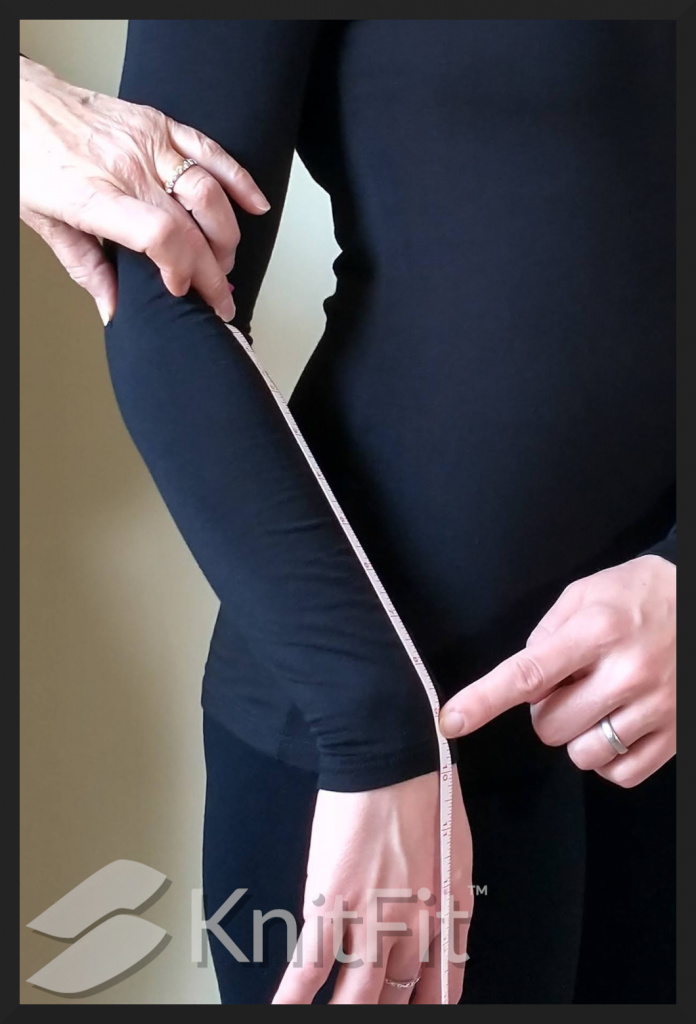
Wrist to Underarm
Measure the length of the underside of the arm from the bend in the wrist to the crease of the underarm. To find the bending point, flex the hand up and down.
Wrist to Elbow
Measure the length of the forearm from the bend in the wrist to the crease of the elbow. To find the bending point, flex the hand up and down.
Elbow to Underarm
Measure the length of the upper arm from the crease of the elbow to the crease of the underarm.
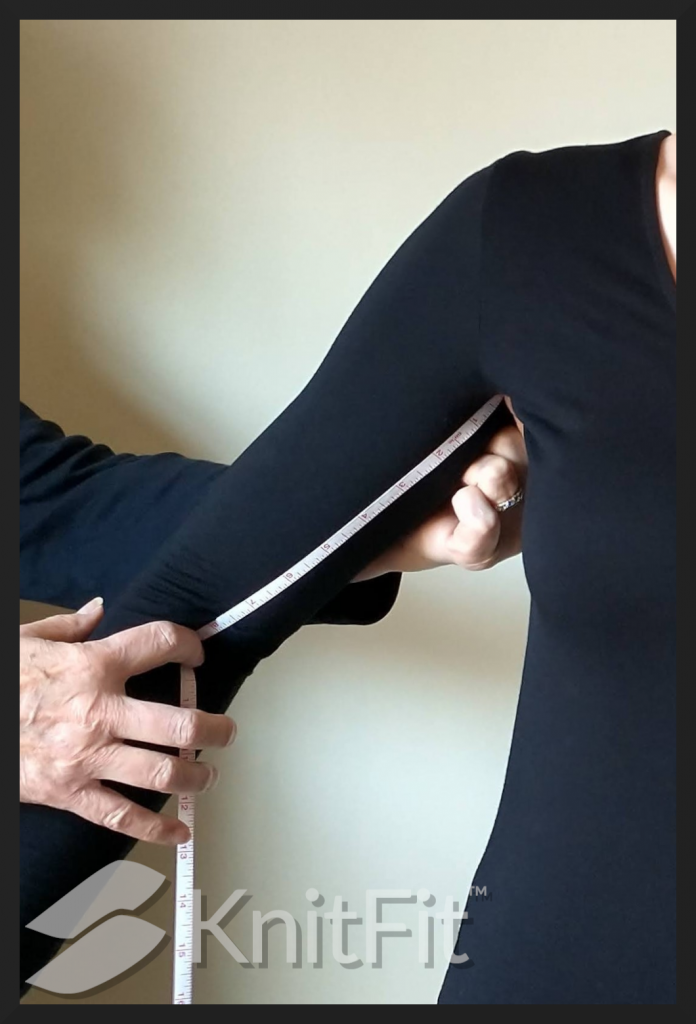
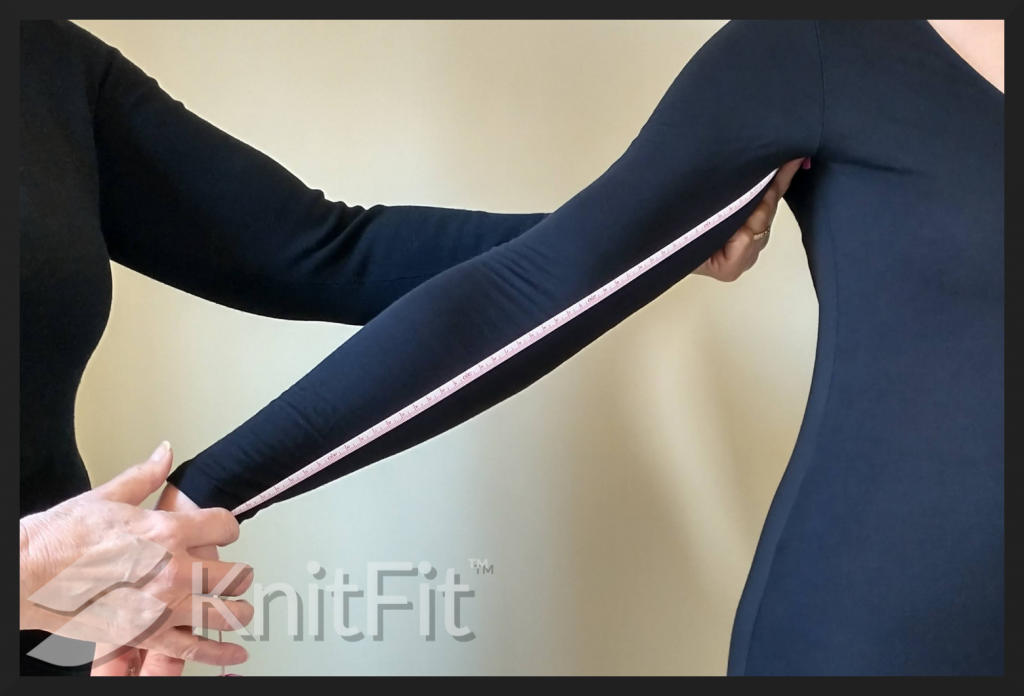
Wrist to Top of Shoulder
Measure the length of the outer side of the arm from the bend in the wrist to the apex of the shoulder (where it pivots when the arm is raised).
Neck and Shoulders
Neck Depth
Measure from the bottom of the V in the center of the collarbone to the point where the neck meets the shoulder.
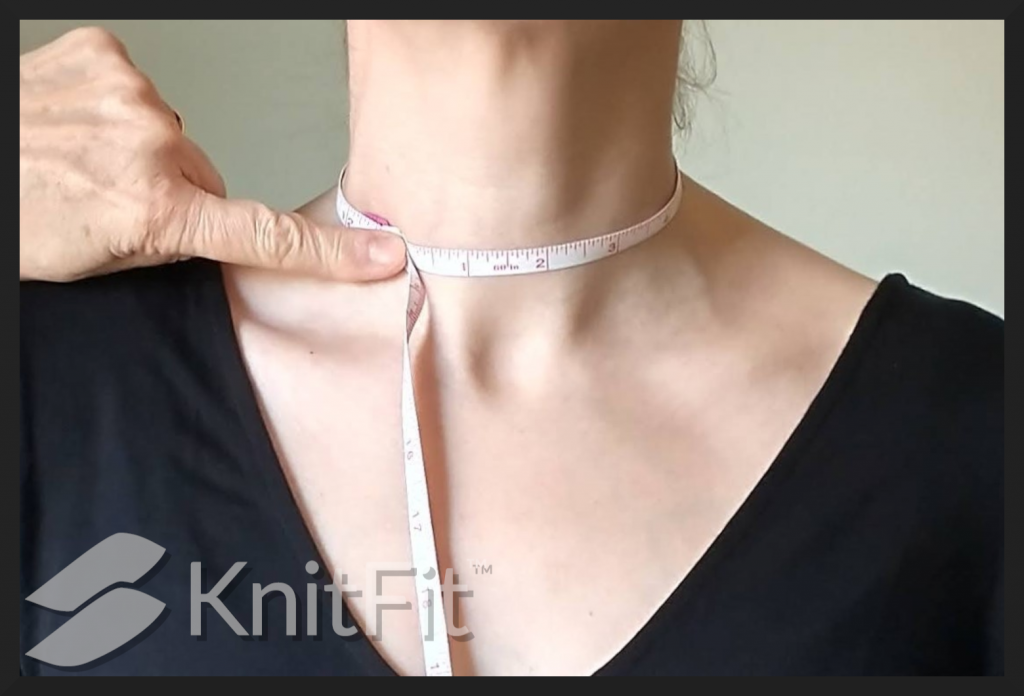
Neck Circumference
Measure the circumference of the neck right above the shoulders.
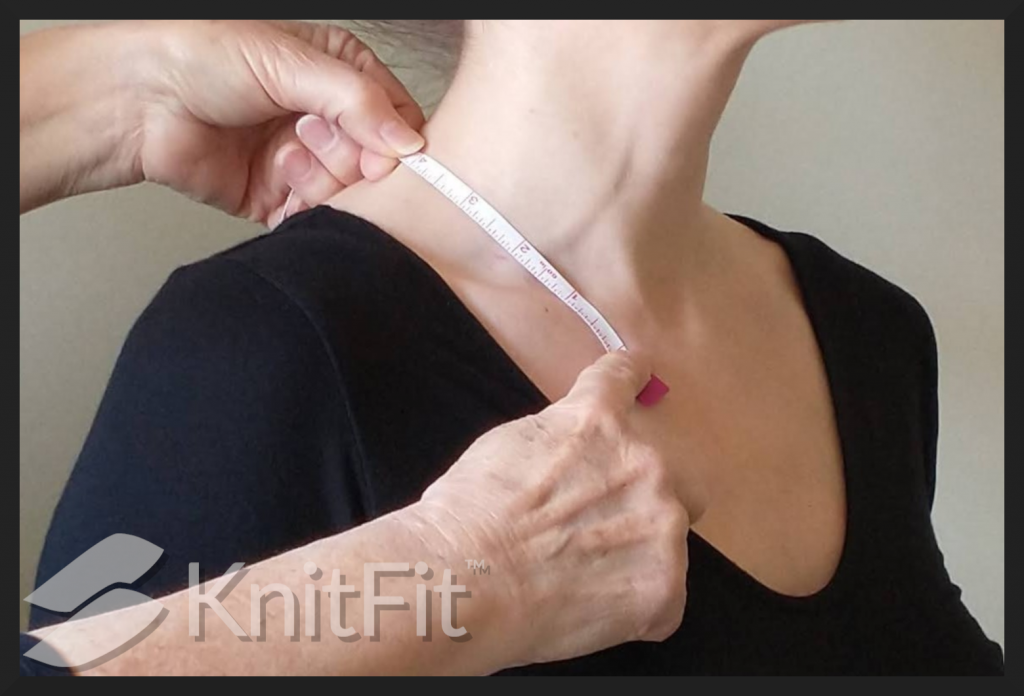
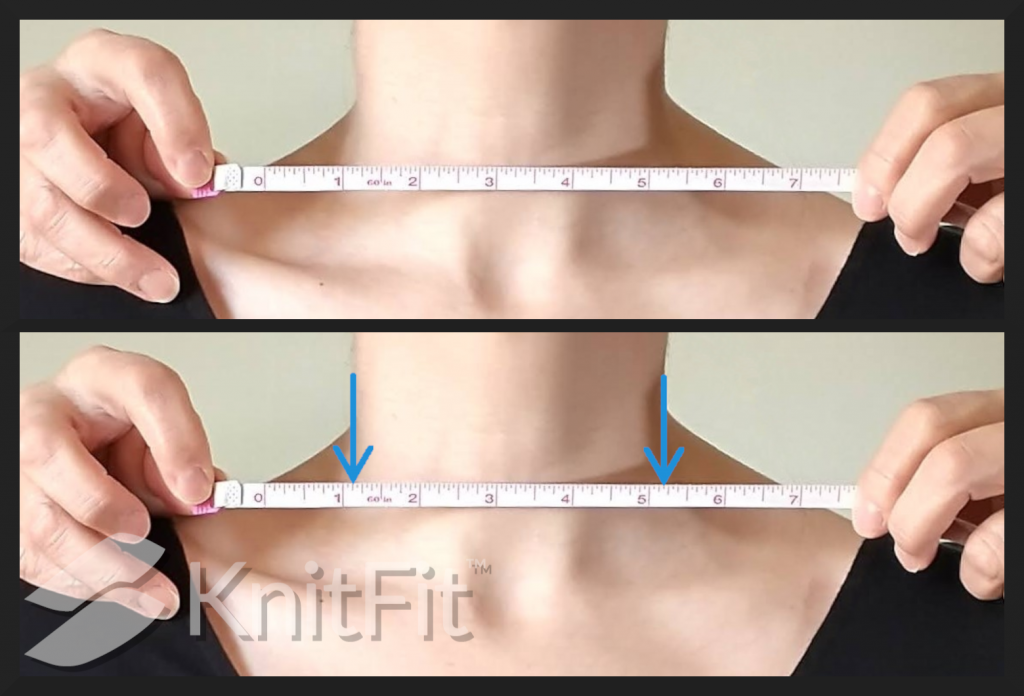
Neck Width
Holding the tape measure straight in front of the neck, measure from one side to the other just above where the shoulder muscles meet the neck.
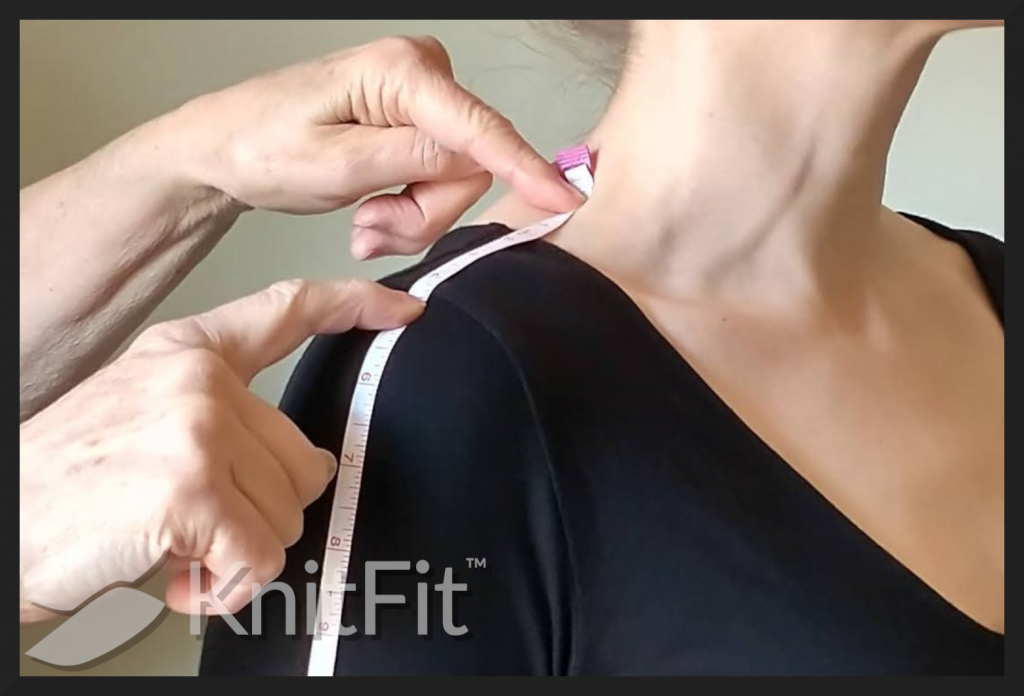
Neck to Shoulder
Measure from the peak of the shoulder (where shoulder muscles meet the neck) to the apex of the shoulder (where it pivots when the arm is raised).
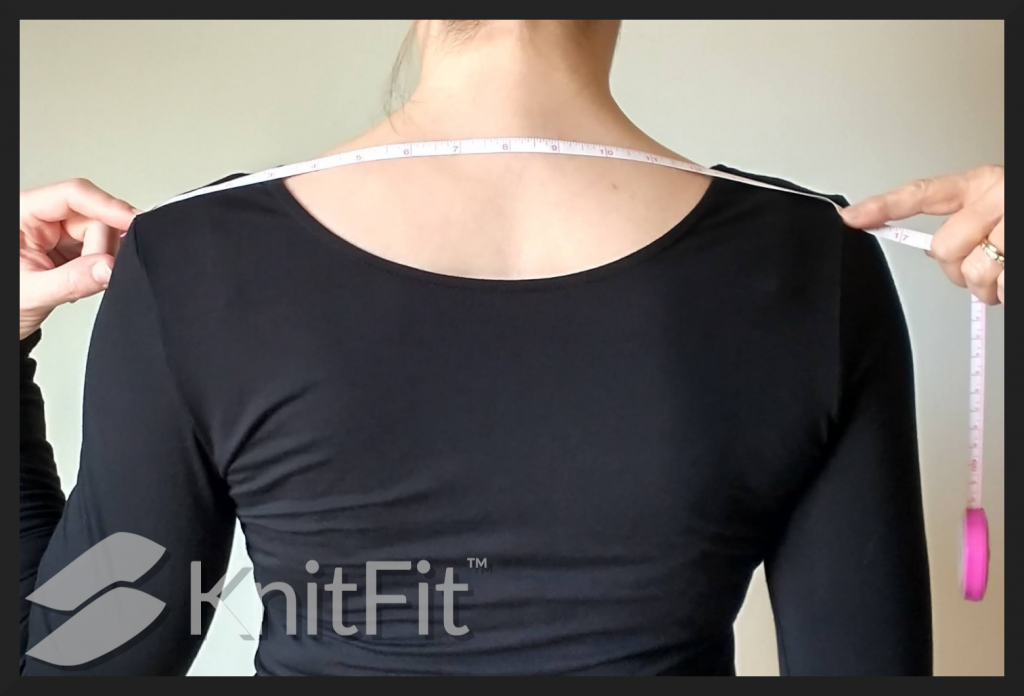
Shoulder to Shoulder
Measure across the back from the apex of one shoulder to the apex of the other. The apex is the bending point where it pivots when the arm is raised.
All Done!
Just click Save. Now you’ve created an ideal measurement profile to produce that perfect personalized fit you’ve been dreaming of!